Building a Meshtastic Solar Node
It’s been a few years since I messed with Meshtastic. I originally found it when investigating a mesh background for a Halo-style radar system for airsoft (a project perpetually on my back burner) and loved the idea. I bought a few radios, flashed them with the right firmware and was amazed I could get miles of range with just the tiny ducky antennas that came with the radios.
I enjoyed messing with the radios so much I created meshtastic-go, a CLI tool built in Go that let me run commands without needing a Python environment. As time went on and other projects came and went, I always came back to dabble with Meshtastic, but never managed to pick up another radio in the wild.
Flash forward to one month ago and to my shock and surprise the Nodes have arrived! Just in my small corner of southern Indiana I can see over 100 nodes, which is truly shocking. It’s so exciting to see an open-source project break into the general consciousness to escape the more nerdy corners on the internet. Knowing that now there are nodes out there and there’s chatter to follow, I got the itch to build a node I could throw up somewhere high, power it with a solar panel and use it to monitor my local mesh.
Le Materials
When working on a project I have a desire for pain guiding principle to try to reuse as many existing parts as I can. I like to keep an eye out for yard sales, free things, auctions and generally accumulate parts that seem like they may be useful later. To make sure this doesn’t turn into full-blown hoarding I have a simple rule. When there’s a project to be done, the parts pile is the first place to check for materials. Thankfully the parts pile was quite generous and gave me almost everything I needed!
Solar Panel
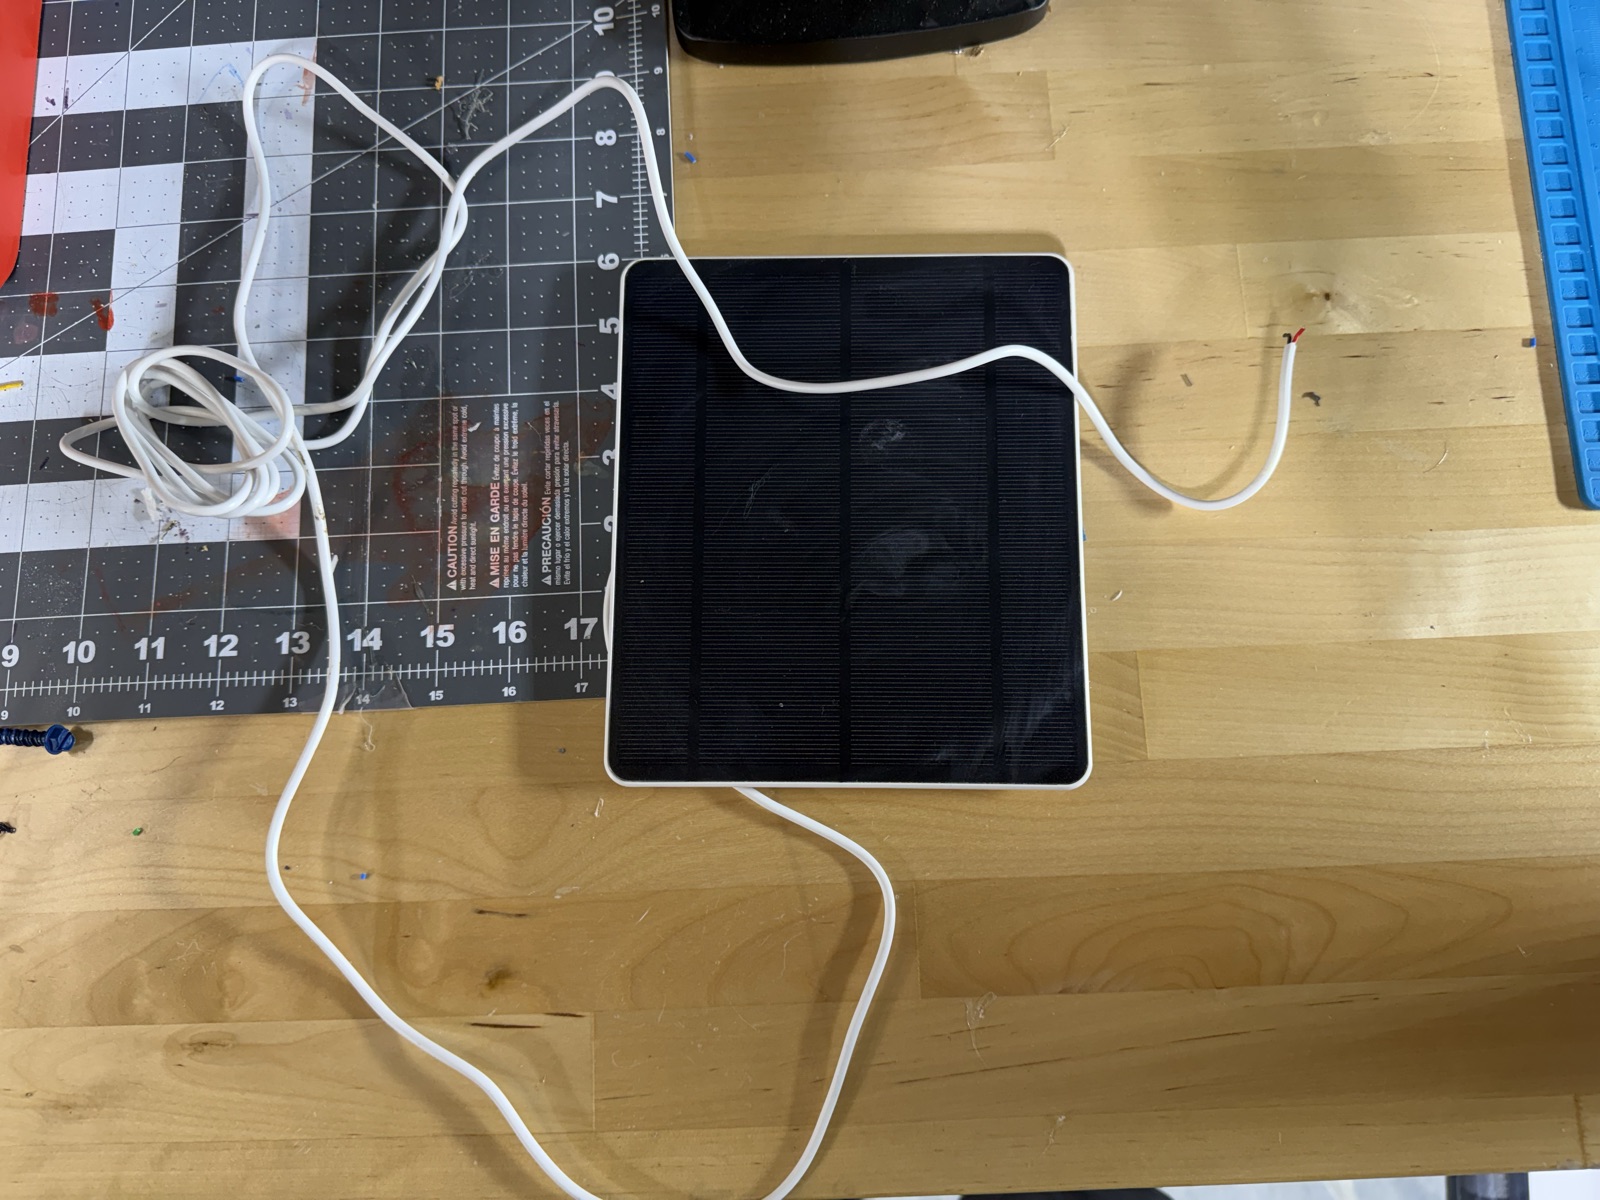
This is a panel I received from Amazon as part of their “Vine” program. If you’ve never heard of it, you sign up to receive free items from Amazon merchants in exchange for giving their product a review. It sounds great and there are plenty of stories of people finding items that retail for hundreds of dollars for free, but in reality you have to dig through pages of junk and still pay taxes on the items you receive. During my time on Vine I managed to snag a few different solar panels that output USB power, so we can reuse one for this project.
“Pelican” Style Enclosure
This is a generic pelican clone I picked up from Menards for $8 on clearance. It’s a solid case, should be waterproof enough for this project and has a hole to route wires through.
Batteries
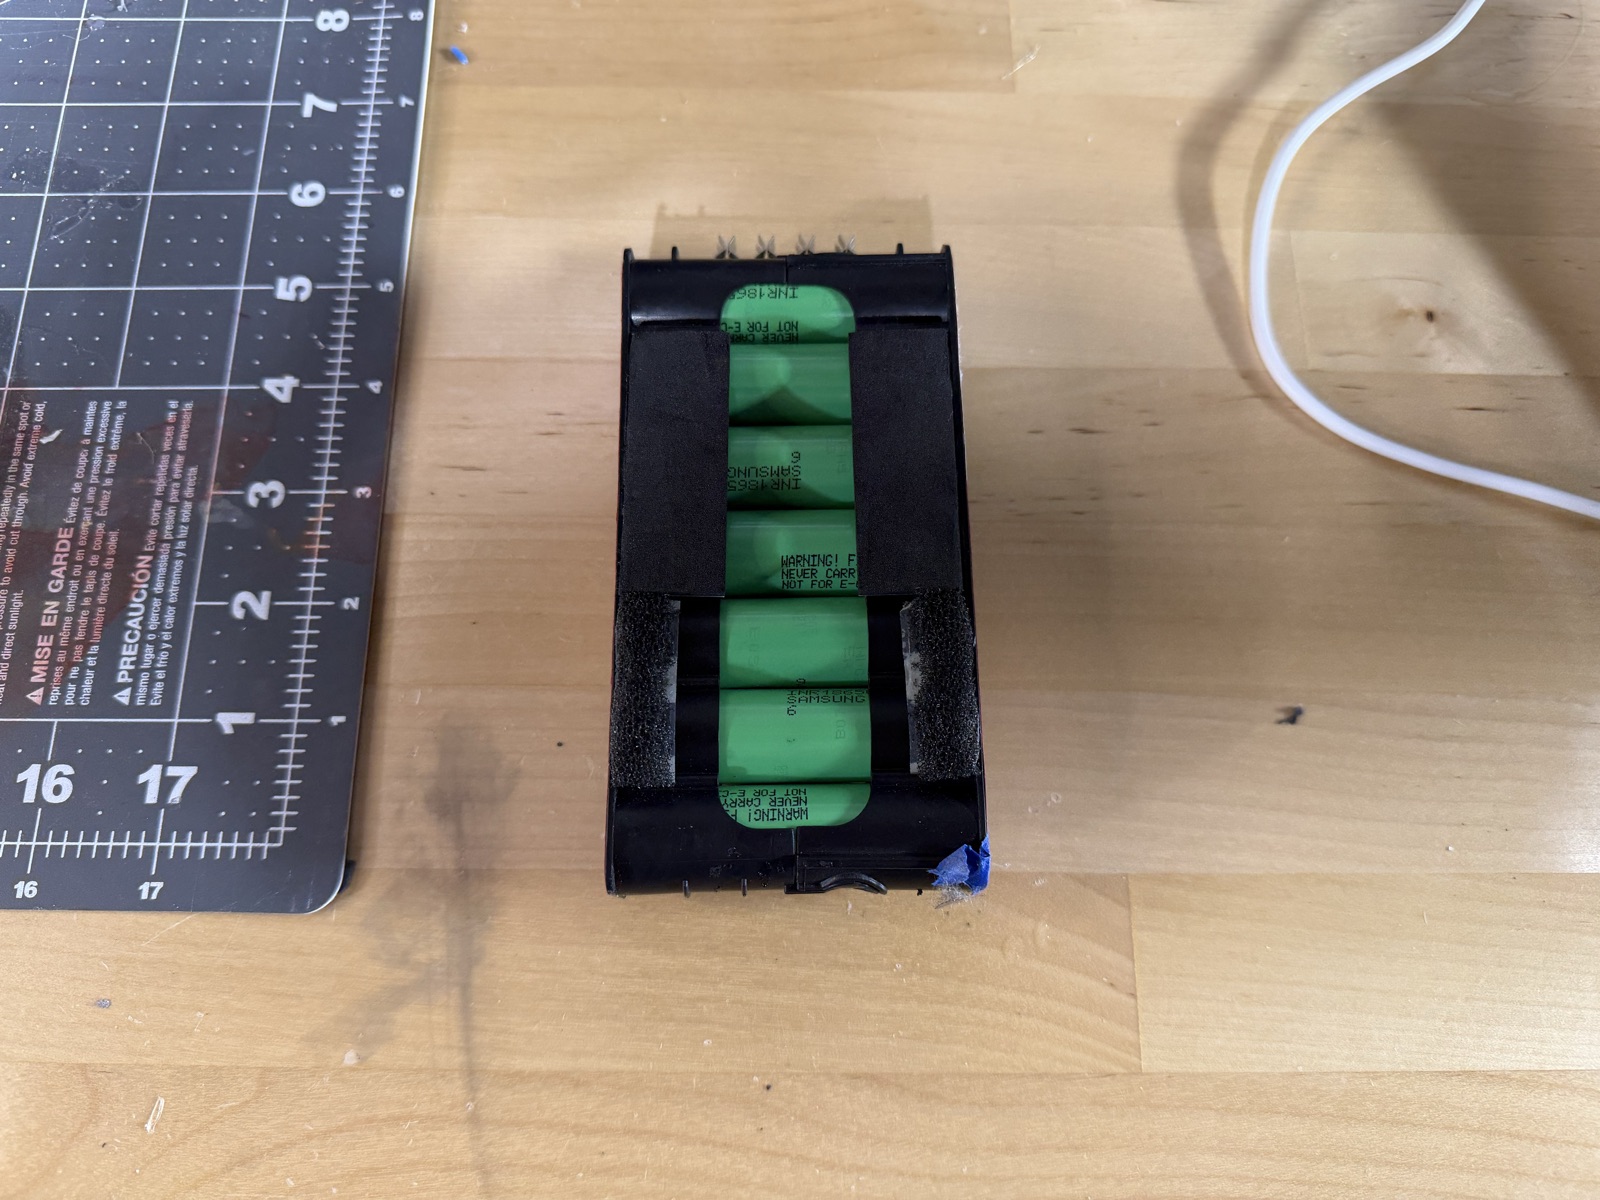
To power this project, we’re going to dip into an old cordless wet mop a friend no longer wanted. Many of the modern “cordless” electric appliances use 18650 cells in varying configurations for their battery packs. As long as you follow the safety rules for working with these cells, they can be harvested and reused for many different projects! I have a plan to write a follow-up blog with more information on how to harvest these handy little dudes for your particular project needs.
Radios
I did end up buying a new Radio for this. My radios are all pushing about six years and are in the “legacy” firmware support for Meshtastic. I figured if I was going to make this a hopefully “set and forget” node I should get a newer, nicer radio. All of the other hardware for the radio (like GPS antennas and the LoRa antenna) can thankfully come from the radio stash. After some research into what was available the other deciding factor in buying a new board instead of re-using a granddaddy board is…
Power Management
Disclaimer: My knowledge of batteries and power management is just enough to cobble things together and not blow them up. I’m not an expert and still learning, so come to this next section with your grains of salt ready.
These new LoRa boards can come with some sweet built-in power management options. I have a box of TP4056 battery charger modules that are still getting doled out, and a few spare Adafruit PowerBoosts to get them up to 5V that could solve the problem of running an ESP32, but why dip into my precious PowerBoost supply (they’re out of stock every time I check :cry:) when I could grab a board that supports it! We’ll go in the solar input directly from the solar panel (sorry USB, you’re getting snipped) and then right into the lithium-ion battery port for our batteries. To help with battery life the plan is to use two 18650s in parallel to give us more juice.
edit: After some testing two didn’t make it through a few days of clouds, so we’re up to four! We also have now routed around the solar port on the Heltec because its charging is limited to a max of 500mA. Because of that we can pull out one of the aforementioned TP4056 modules from the box, wire the 4 parallel 18650s to the B terminals, send the out to the battery in on the Heltec and send the snipped solar panel leads to the IN ports. This board charges up to 1000mA so we should get a faster charge on brighter days to fill up our battery pack.
(I forgot to snap pictures of the 4 cell configuration, so keep in mind all pictures of the project below are the V1.)
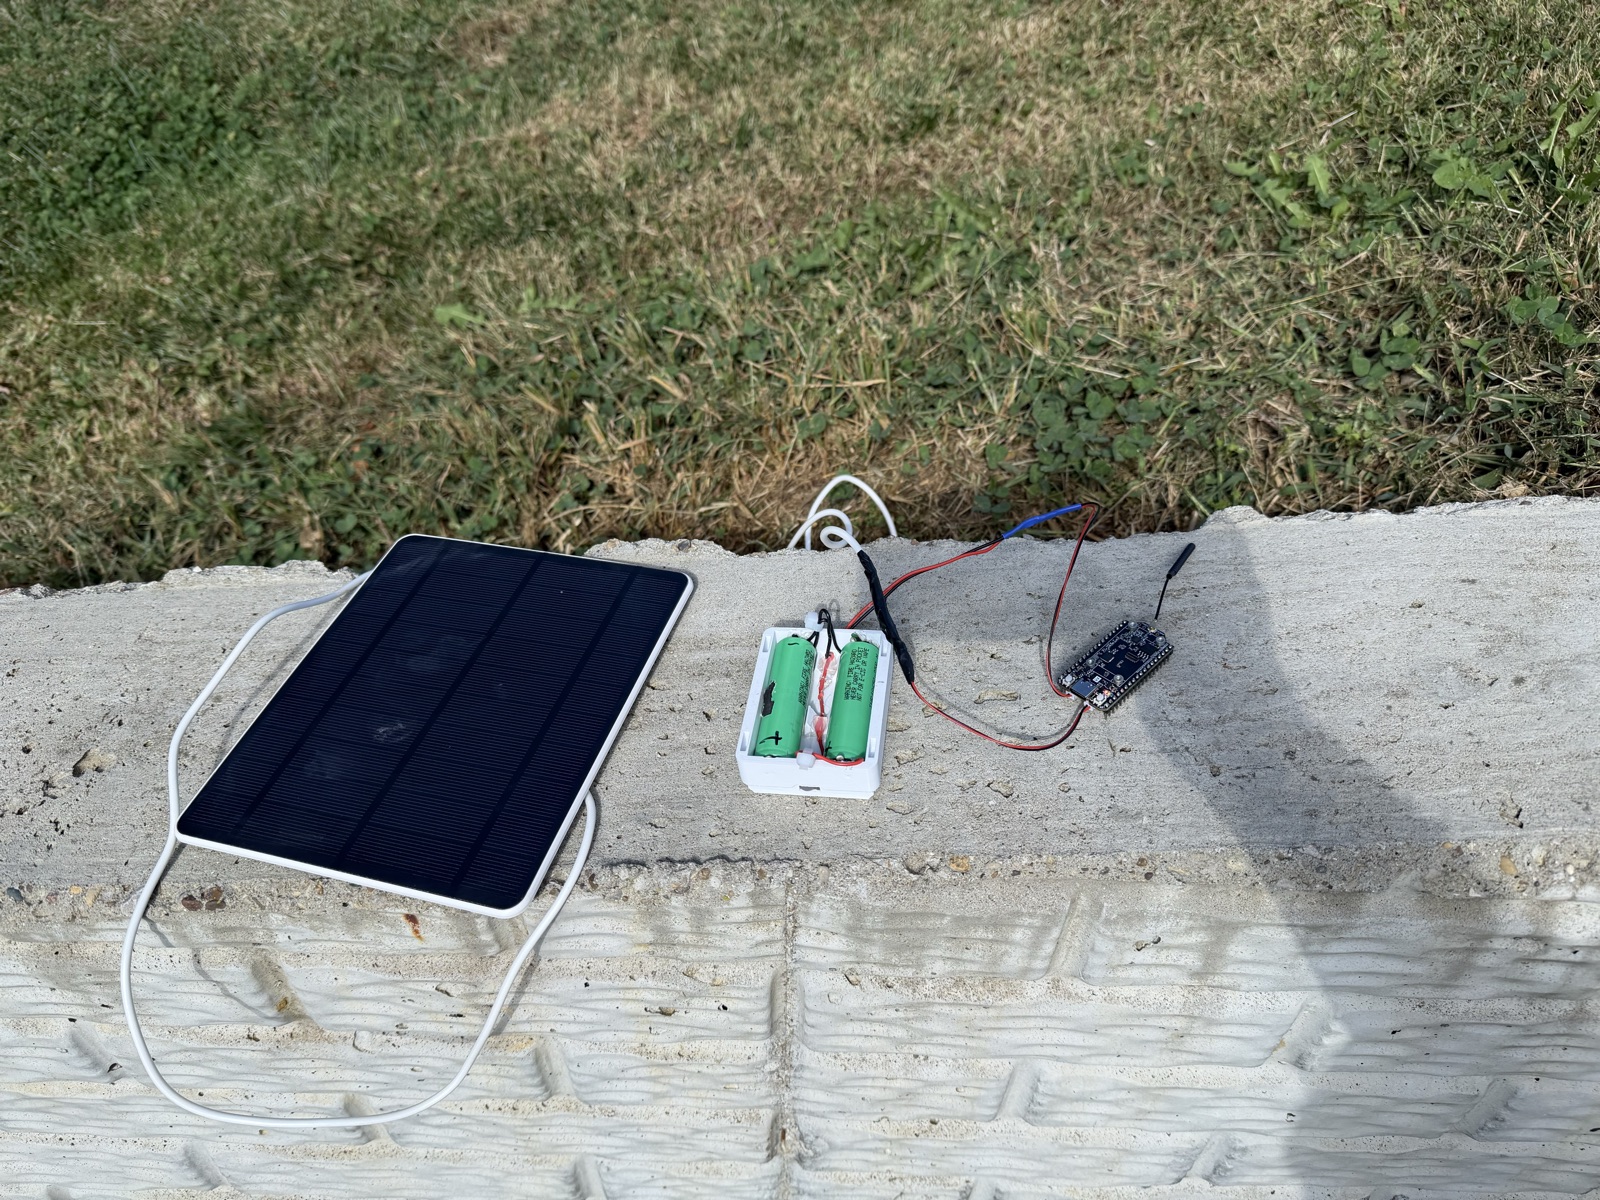
This rig is also itself a test for what we can get away with in a solar node. It’ll live outside where I can easily replace components if (ahem when) they fail, so if this doesn’t work we’ll use a better solution in the final product.
To waterproof the device I decided to trust the label and see what happens! Will I regret it? Only time will tell! For now let’s assume the case as provided from that store where you save big money (if you’re from the Midwest I assume you’re hating me for a song that’s stuck in your head right about now) will do its job. I’ll just focus on waterproofing the parts of the box that are left open for wire routing, namely the pressure hole that I’m leaving open for just that purpose!
After I figured out the final wiring, ran a test with everything routed to confirm I could get nodes, and then double-checked everything was good (I have a history of sealing projects too early, don’t ask), I used some good ol’ hot glue to fill up the hole and assume it’ll hold. I’ll also point the hole downwards and mount the components up just in case there’s pooling. Assuming you’ve failed when waterproofing something means you won’t ever be disappointed, just amazed if it actually works!
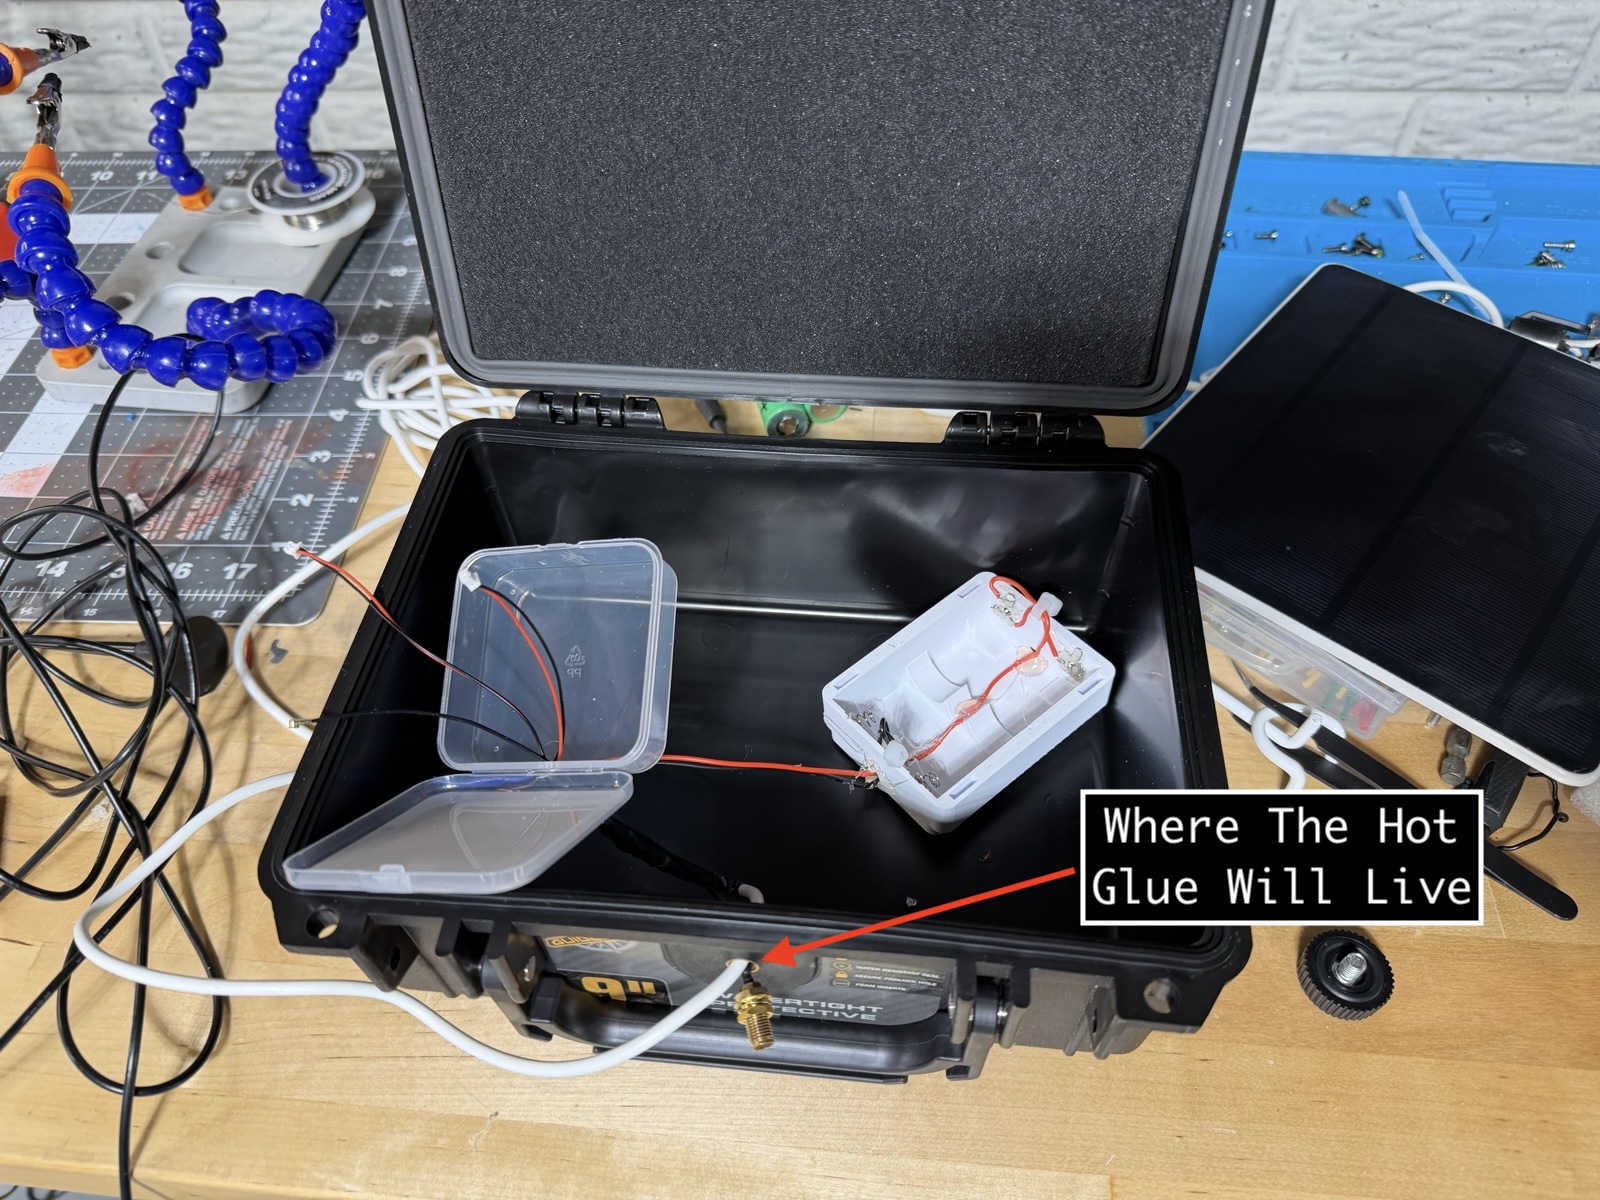
(Before this goes up high I’ll probably use caulk, but I’m saving future me the trouble of having to change these wires out by using heat gun friendly hot glue)
Flashing the firmware is a breeze for Meshtastic these days. I almost exclusively use the web flasher. The hardest part is remembering the Bluetooth PIN is by default 123456 and that you don’t need to be clever and look for a key in the serial console. Not that I did that…for a long time.
Client Modes
Let’s take a second to talk about client modes for Meshtastic. The different roles can be confusing, and most of the time CLIENT will get you to your end goal for whatever your purpose. I recommend reading the excellent guide on client roles from the Meshtastic team to find out more, but for this configuration (a beefier client at a higher elevation acting as a relay for a less well positioned radio) we have the perfect pre-built option CLIENT_BASE. This mode lets the operator set a priority node when broadcasting messages and means my little node in the office gets premium airtime from my better positioned solar node. My office client can take advantage of CLIENT_MUTE to stay quiet when messages come in from the mesh. I don’t have any radios within a few miles of me, but might as well practice being a good member of the mesh and not rebroadcast things I know my solar node will handle.
Why not ROUTER, you ask? (If you didn’t ask and I’ve forced a question upon you, forgive me.) It’s because ROUTER is for a HAM radio operator with a tower. The best description I’ve seen is a ROUTER should connect cities to the same mesh. My little node will be well positioned, but not that well positioned.
Remote Configuration
One other consideration is how can I configure this node once it’s up? I mean I could stand underneath it outside and wave my phone up as far as my 5 foot 8 and a half reach can get me, but Bluetooth will always betray you when you need it most. Let’s instead set up remote admin on our node so we can manage it with our office node!
Doing so is fairly easy with Meshtastic these days, but some things still tripped me up with the setup. First remember that CLIENT_BASE lets you add a favorite radio to prioritize rebroadcasting messages from, but you have to do that from the app. To authenticate for remote management you also have to copy your controlling radio’s public key to the node you want to manage. Both of these require the app, so make sure these get done before you toss it up in a tree.
Here’s what tripped me up: first, you have to enable remote administration on the app.
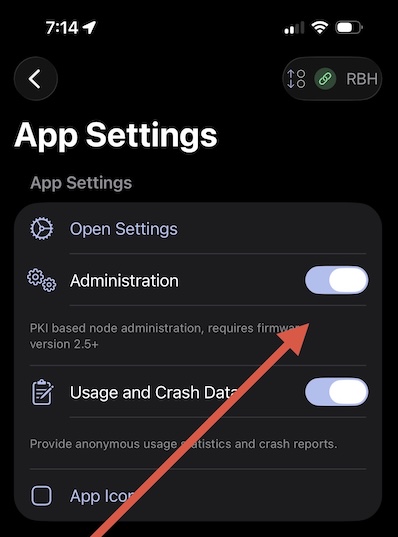 And then to manage it, you select your managed node from a new dropdown available on the settings page.
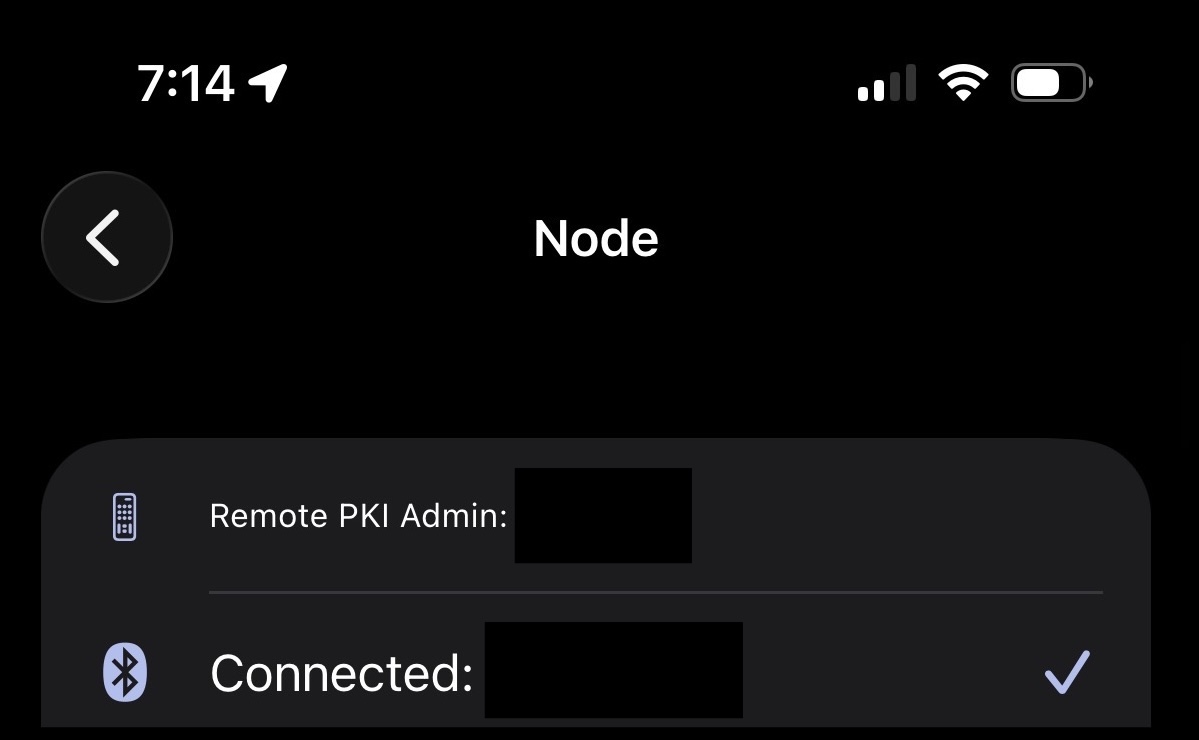
One Last Thing
One last consideration: Meshtastic or MeshCore? I honestly don’t know enough about MeshCore to say if it’s worth trying out or not. I’ve been working with Meshtastic for a long time and have seen it transition between maintenance teams and keep on kicking. MeshCore is a newer project that, while very cool, doesn’t have the same history. Does it mean I won’t try it? Well, no—flashing is free and I can see what’s out there! But as of this writing my final plan is still to live on the Meshtastic network as long as there are other mesh heads to talk to.
Finally!
It lives!
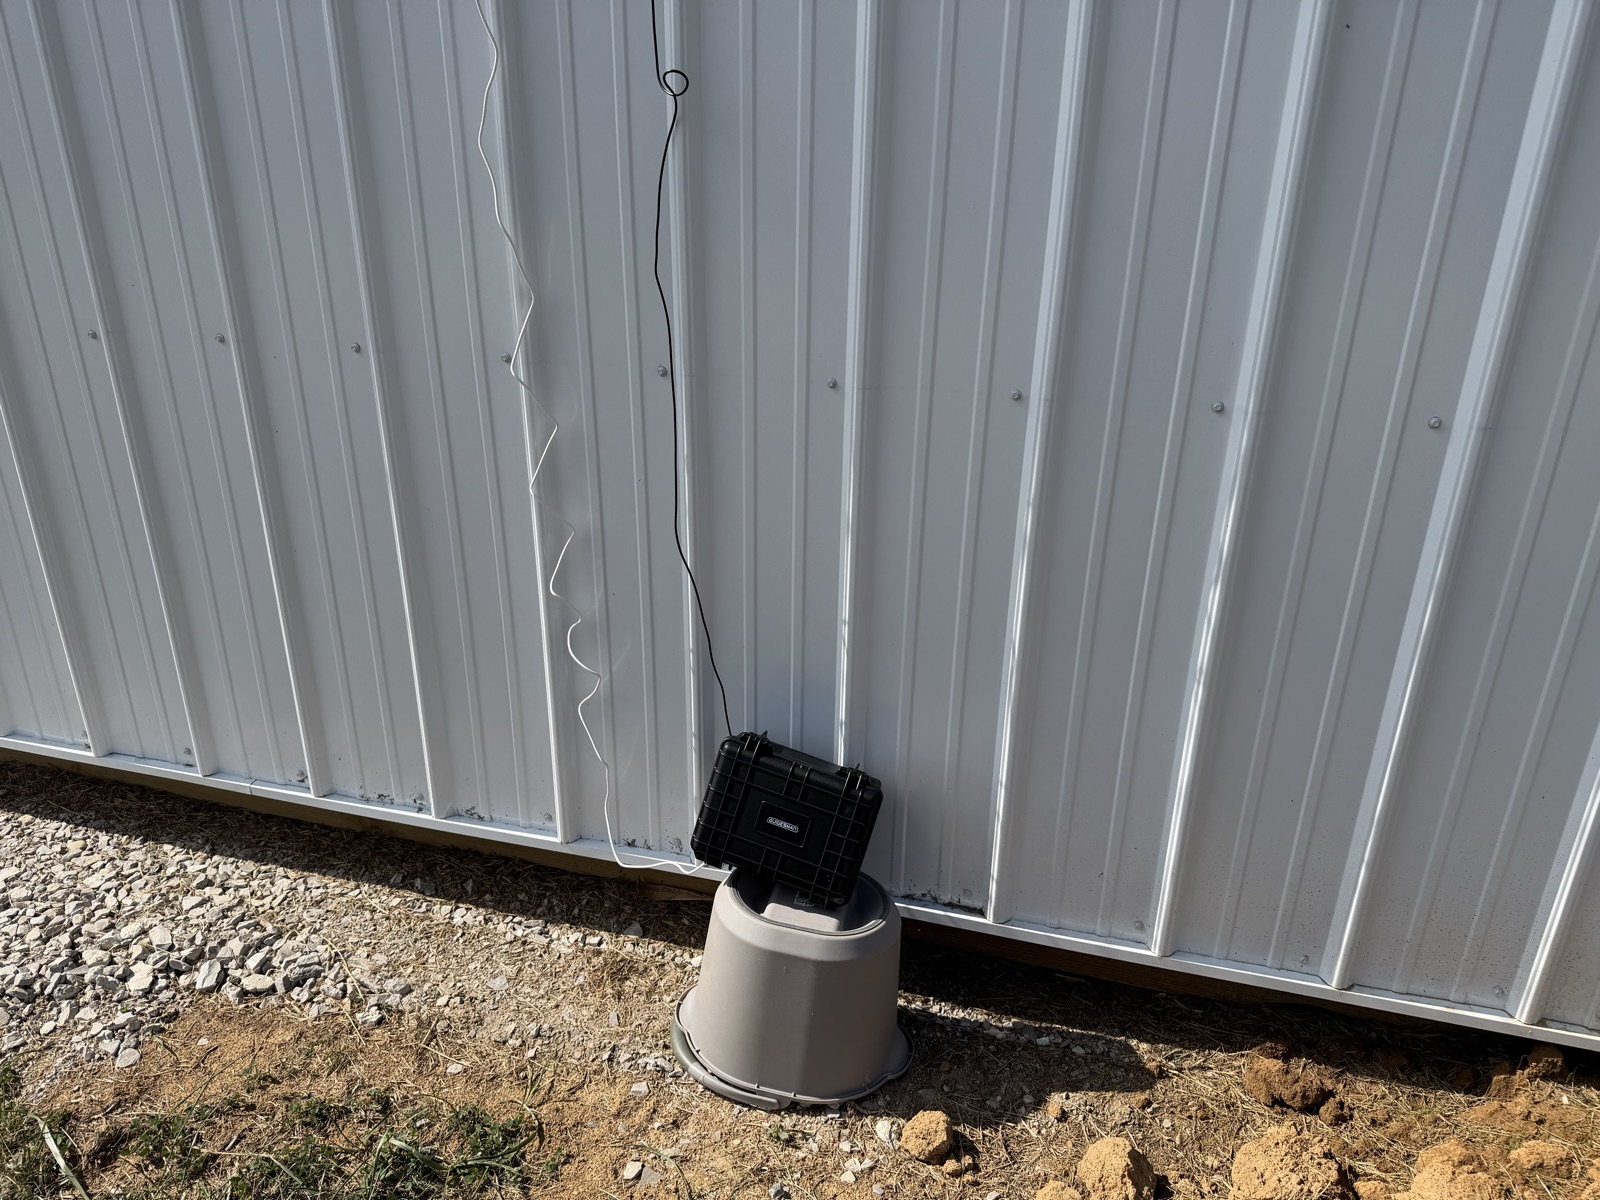
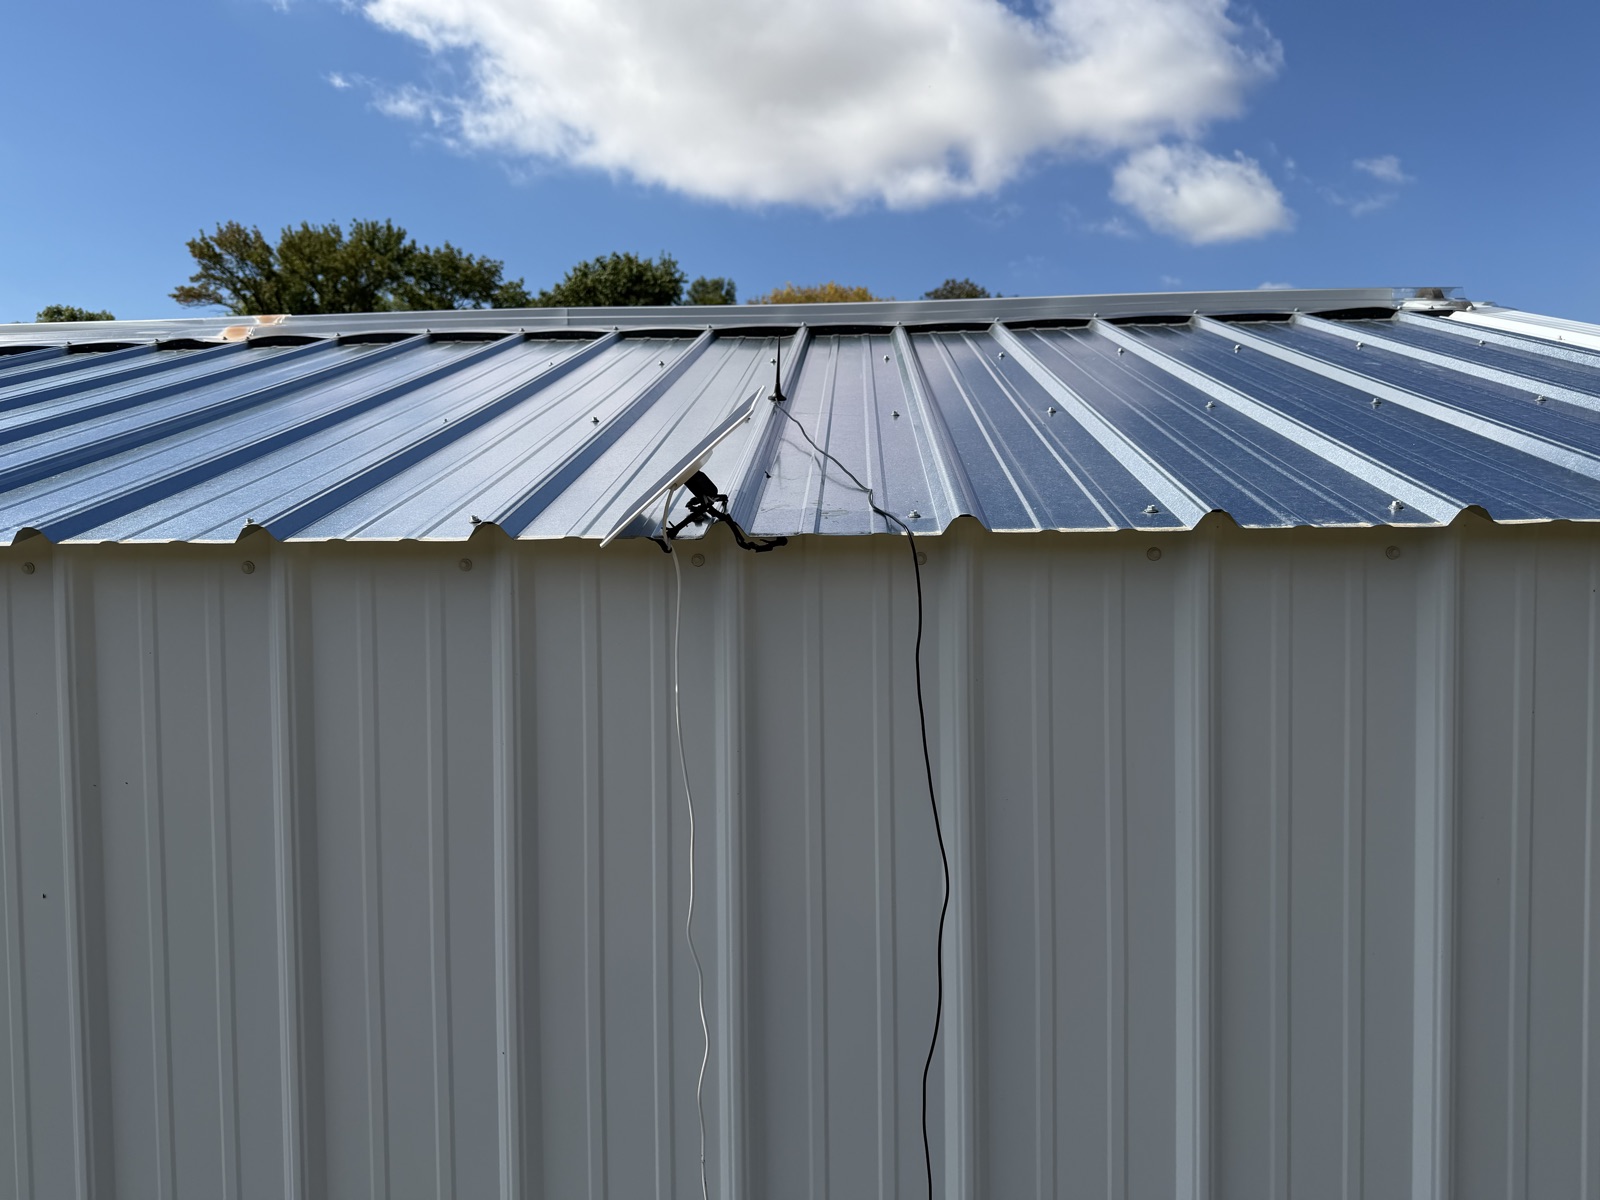
So far it gets significantly better range than my office window node and it’s not even that high. I’ll leave it out for a few weeks to test the weatherproofing, but assuming everything works fine there will be a follow-up blog post where I scheme up a way to get this in a really tall tree on my property. The plan right now is some string and a drone, but hopefully the final plan will be a bit more professional (spoiler: it won’t be)